Article
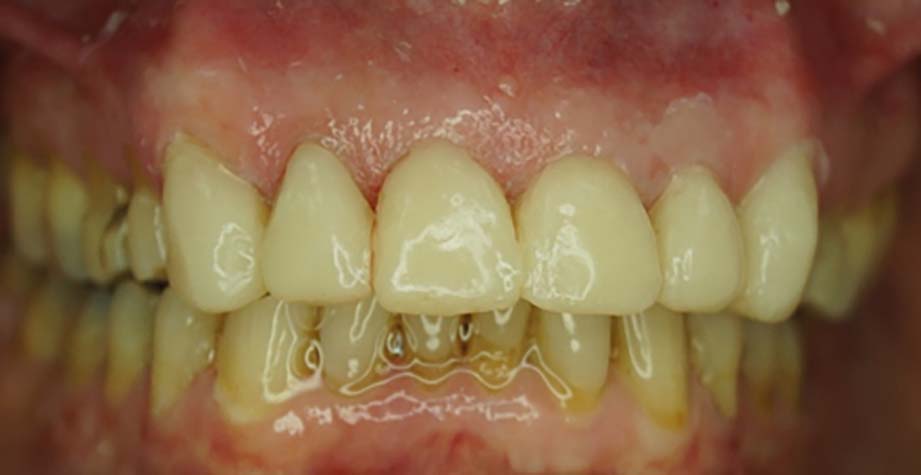
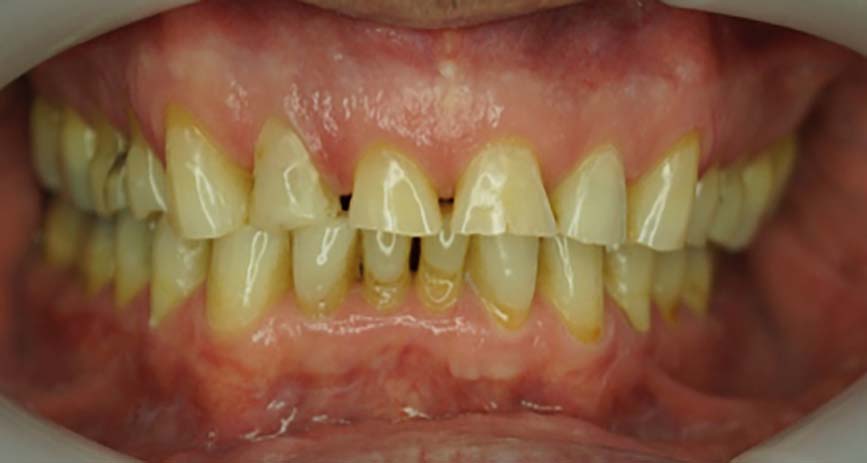
Direct composite resin restorations are increasingly being recommended as a minimally invasive treatment option for oral rehabilitation in patients with tooth wear or inherited dental anomalies, eg microdontia, amelogenesis imperfecta. These restorations are relatively economical compared to cast restorations and reversible, with high survival rates of up to 90%.1, 2
A major drawback for this treatment is the time required for building up several affected teeth with composite resin. Apart from increasing the cost of treatment, the lengthy procedure makes it unsuitable for less co-operative patients (eg children) and those with special needs who, due to physical or mental conditions, find it difficult to co-operate throughout treatment. Studies showed that longer procedural time results in poorer survival rates at seven years.2 These two factors may negatively affect the survival rate or aesthetic outcomes or, in some cases, may result in the treatment being denied.
Several methods have been proposed to facilitate composite build-up restorations.3, 4, 5, 6 However, these techniques still require a significant amount of time, may not be appropriate for all patient groups (eg patients with special needs), and may compromise the quality of treatment.
An innovative technique
The author has developed an innovative technique to overcome the above shortcomings and yet maintain high standards of care, even for less skilled practitioners.
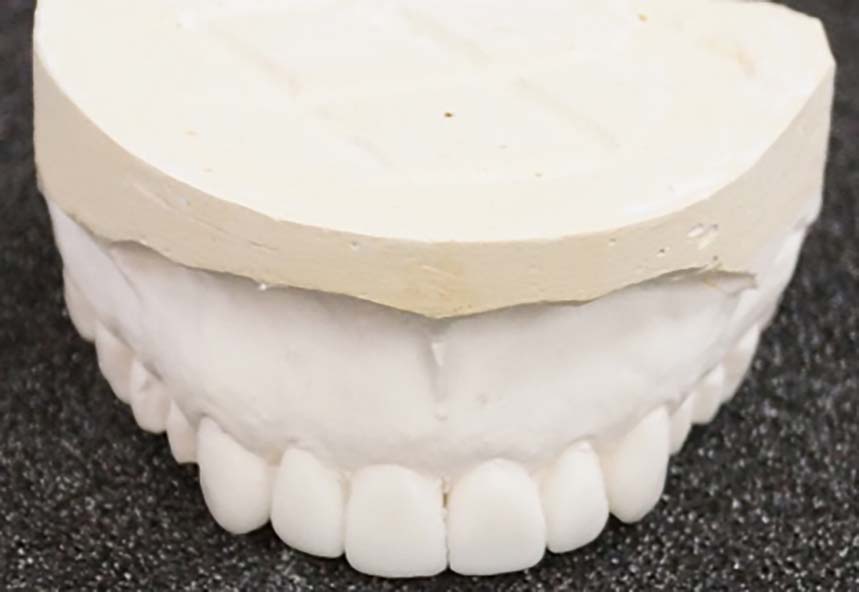
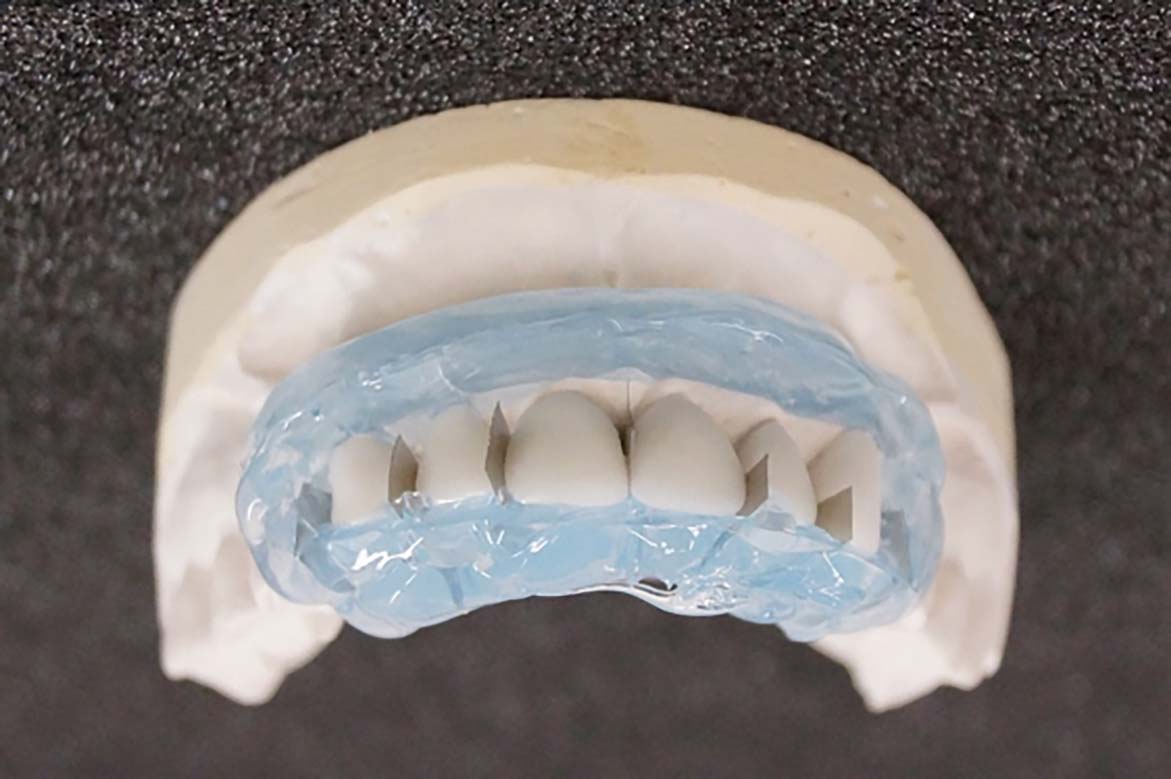
Following initial assessment and treatment planning, study models are articulated, and diagnostic wax-ups are constructed to the new bite (Figures 1 and, 2). The thickness of wax should be at least 0.5 mm at cervical margins and 1 mm on occlusal/incisal surfaces. The composite resin restoration may be conformative to patient's existing bite or at increased occlusal vertical dimension. Once patient and clinician agree with the new occlusion, the mesial and distal surfaces of the teeth to be built up are separated on the models, using superflex diamond discs (Edenta, Switzerland). Then, stainless steel matrix bands (eg siqveland matrix band) are cut to the size to fit in interproximal spaces on the model. The metal band should extend at least 2 mm beyond the proximal surface of teeth in all directions. Transparent A-silicone (Memosil 2, Heraeus Kulzer, Germany) is then squeezed into and around the interproximal surfaces. Then, the prepared matrix bands are fitted in the interproximal spaces. At this stage, additional transparent silicone is injected to cover all teeth surfaces and metal bands. The template should extend at least one tooth or 5 mm on either side of the teeth/tooth being treated (Figure 3). It is recommended to prepare the template at least 3 hours prior to the procedure to ensure that transparent silicone is fully set. Otherwise, it may interfere with composite polymerization.
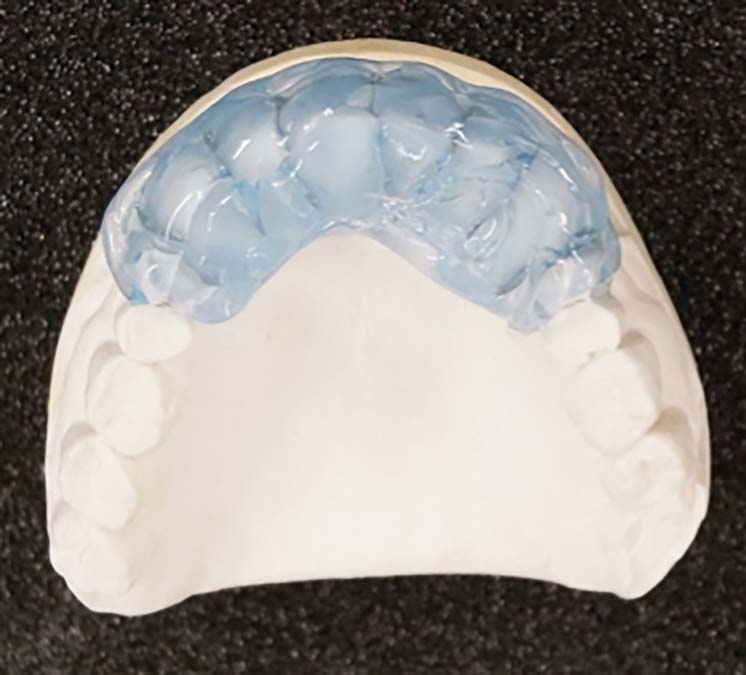
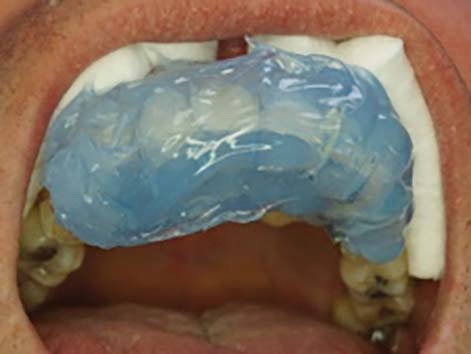
Teeth to be restored can be isolated using rubber dam (preferred) or cotton rolls. The teeth are cleaned with pumice and a slow handpiece brush to remove stains and debris. Teeth in each sextant or quadrant can be treated together. It is recommended to construct the silicone template for each sextant or quadrant separately. Although it is possible to restore the whole arch at once, it may be difficult to seat the silicone template when the full arch is being treated. This template will then be filled with adequate composite resins and fitted in the mouth and light cured for 40 seconds on each surface (Figure 4). This technique also allows for composite additions to the labial surface, if required, simply by cutting out a window on the labial surface whilst the rest of the template helps maintain isolation (Figure 5). Therefore, any deficiencies can be restored and different shades of composite resin can be painted on each surface, if appropriate.
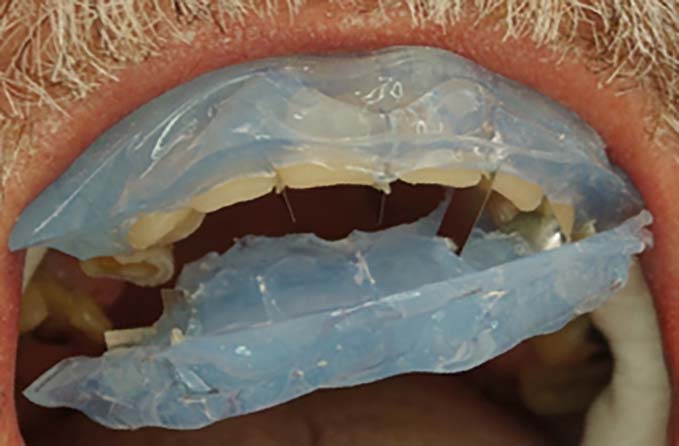
Once the required outcome is achieved, the template can be removed. To facilitate its removal, it can be sectioned on the occlusal/incisal surface with a scalpel size 11 or 15, and then peeled off the teeth from labial and lingual/palatal surfaces separately (Figure 6). Remaining matrix bands in interproximal surfaces can then be pulled out using tweezers.
Using matrix bands helps maintain contact points cleared during the procedure. However, if teeth are still linked due to composite residue between the teeth, this can be removed using an interdental micro-saw (MicroSAW, Perfection Plus). The excess composite resin around the cervical margins is then removed using diamond polishing burs. The polishing and finishing stage is similar to conventional chairside composite resin restorations. It is important to use interproximal finishing strips to remove any roughness from interproximal surfaces (Figure 7). Post-operative maintenance and advice for this technique are similar to conventional techniques.